How to integrate Paddle to your React JS application
Published: 17 August 2019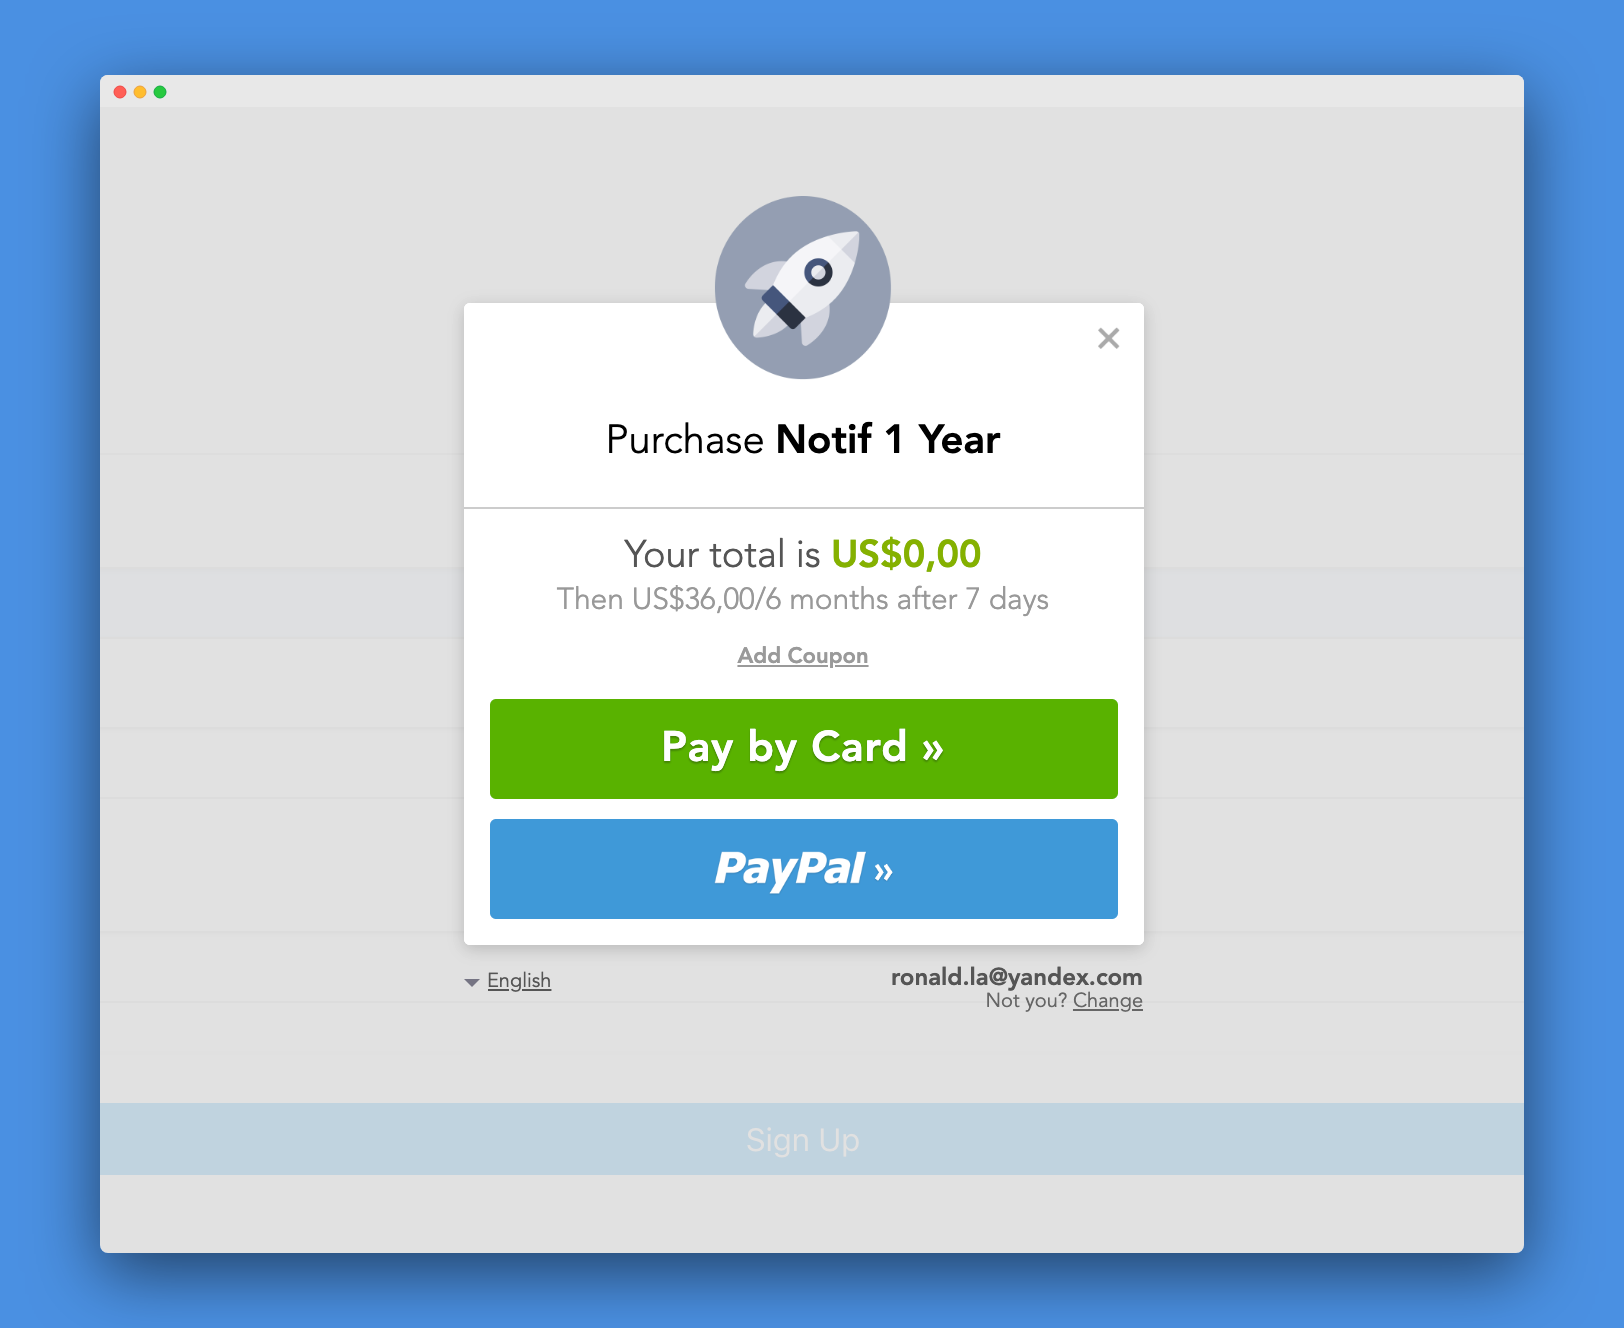
Grab the project’s source code from Github here!
Being from South Africa, I unfortunately don’t have true access to Stripe - which is the goto Payment Processor most startups today. Due to some backwards South African laws, apparently it’s illegal for South African Payment Processor to accept any currency other than ZAR (South African Rand).
As a startup trying to reach the international market, quoting in Rand is probably the worst idea ever. Nobody is going to trust a new product in an unknown currency, with an unknown payment processor at international level.
What about PayPal? It’s an option - but last time I implemented PayPal (not Braintree) for a client, I went through blood, sweat and tears trying to get it up. It’s got a really complex and frustrating API compared to the more modern Payment Processors.
These days, I use Paddle JS.
While not directly a payment processor, they are more of a middleman reseller, meaning they handle the payment on your behalf, in your currency of choice (USD in my case), take a cut and then pay you the difference.
They have really good documentation, but it was missing one thing, which I feel is kind of important today - how to use it with React. It’s actually relatively straight forward.
The foundations and process will stay the same as (https://paddle.com/docs/paddle-checkout-web/), but you will add a touch of React to it.
I will assume you already know React and have built everything up to where you want to receive your payment.
First things first - go to your index.html file in your public folder.
At the bottom, just above your </body> closing tag, add the library script.
<script src="https://cdn.paddle.com/paddle/paddle.js"></script> <script type="text/javascript"> Paddle.Setup({ vendor: 1234567, debug: true }); </script>
For development, I made debug true. We’ll get back to this in a bit. Make it false when you go live.
You can get your vendor key in the integration section of your Paddle Dashboard. - here’s a direct link: https://vendors.paddle.com/authentication
Now go into the component where you want to handle the Payments.
In my case, I made a components RegisterForm.jsx Oh, by the way, I’m using React hooks to handle the state.
import  React, {useState} from  'react';

function  RegisterForm() {

return (

<>

<form>

<p>Email</p>

<input  type="email"  placeholder="hi@ronaldlangeveld.com"/>

<br/>

<input type="submit"  value="Make Payment"/>

</form>

</>

);

}

export  default  RegisterForm;
Now let’s go ahead and import Paddle… But we didn’t run npm install fweigbgb - yeap… we’ll have to import is a little bit differently.
Inside of your function / components class, add the following line.
const Paddle = window.Paddle;
From my understanding, this grabs Paddle globally, which is being loaded from the index.html file.
I assume Paddle doesn’t have an npm library because it needs to load a secure and up to date version of paddle.js every time.
Now let’s hook your email form up to your state quickly.
const [Email, setEmail] =  useState("")
const  email  = (e) => {
setEmail(e.target.value)
}
<input onChange={email} type="email" name="name" placeholder="hi@ronaldlangeveld.com" value={Email} />
Now lets’s get going with Paddle!
Create a product in your Paddle dashboard. I recommend making a product that costs $0 to develop with, since Paddle doesn’t have a proper Sandbox mode for testing. Then get the product ID.
We want to launch Paddle as soon as we hit the Submit button.
Let’s write the payment handler function.
const  handlePayment  = (e) => {
e.preventDefault();
if(Email.length  >  0){
Paddle.Checkout.open({
product:  567487,
email:  Email,
successCallback: (data, err) =>{
console.log(data);
//ADD YOUR EXTRA LOGIC TO SEND TO BACKEND
}
});
} else {
alert("Please enter an Email Address")
}
};
And now lastly, add the handler to fire when the form gets submitted:
<form onSubmit={handlePayment} />
And that’s it.
Here’s the full component.
import  React, {useState} from  'react';


function  RegisterForm() {


const  Paddle  =  window.Paddle;


const [Email, setEmail] =  useState("")


const  email  = (e) => {


setEmail(e.target.value)


}


const  handlePayment  = (e) => {

e.preventDefault();

if(Email.length  >  0){

Paddle.Checkout.open({

product:  567487,

email:  Email,

successCallback: (data, err) =>{

console.log(data);


//ADD YOUR EXTRA LOGIC TO SEND TO BACKEND

}

});

} else {


alert("Please enter an Email Address")


}

};


return (

<>


<form  onSubmit={handlePayment}>


<label>

Email

<input  onChange={email}  type="email"  name="email"  placeholder="hi@ronaldlangeveld.com"  value={Email}  />

</label>

<br/>

<input  type="submit"  value="Make Payment"/>


</form>


</>

);

}


export  default  RegisterForm;
